I made a chuck box to use for camping trips out of plywood that contains pretty much all of the tools needed to cook a great meal while camping.
Jump to the Final Product here.
I am going on a car camping trip in April (2026) and thought it would be a nice idea to build before then. I figured it would cost a bit to buy all the items to put inside and materials but if I built it well enough, it should last me a while.
I stole the general design from the youtube video below while adding some of my own tweaks. I really liked the compact design and layout when it is in use that it had.
My design differs from the video slightly to fit the items I got. I started the design process by beginning to collect the items I would fill the chuck box with:
- Coleman 2 Burner Stove
- 2x sheet cutting boards
- Dutch Oven
- French Press Coffee Maker
- 10″ Pan with Folding Handle
- 2.6L Pot
- 4x Plastic Bowls
- Various Spices & Hot Sauce
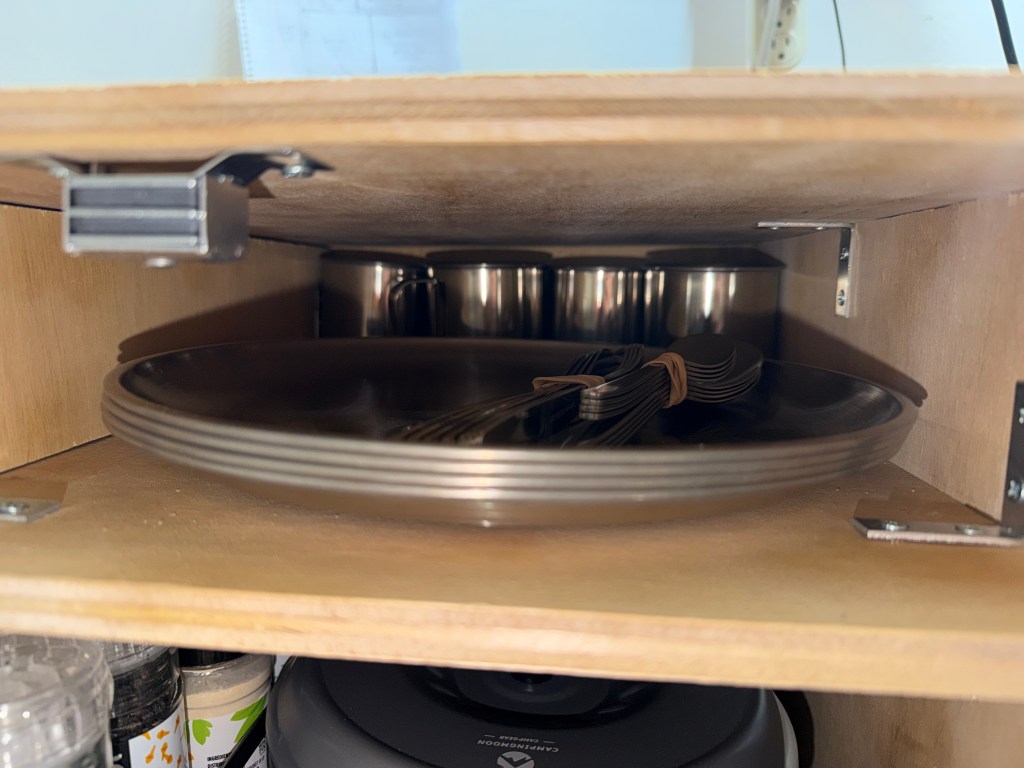
- 4x Metal Plates
- 4x Metal Mugs
- 4x Spoon, Fork, Knife Set
- Various cooking utensils (spatula, wooden spoon, thongs, knives, etc)
- Leather Gloves
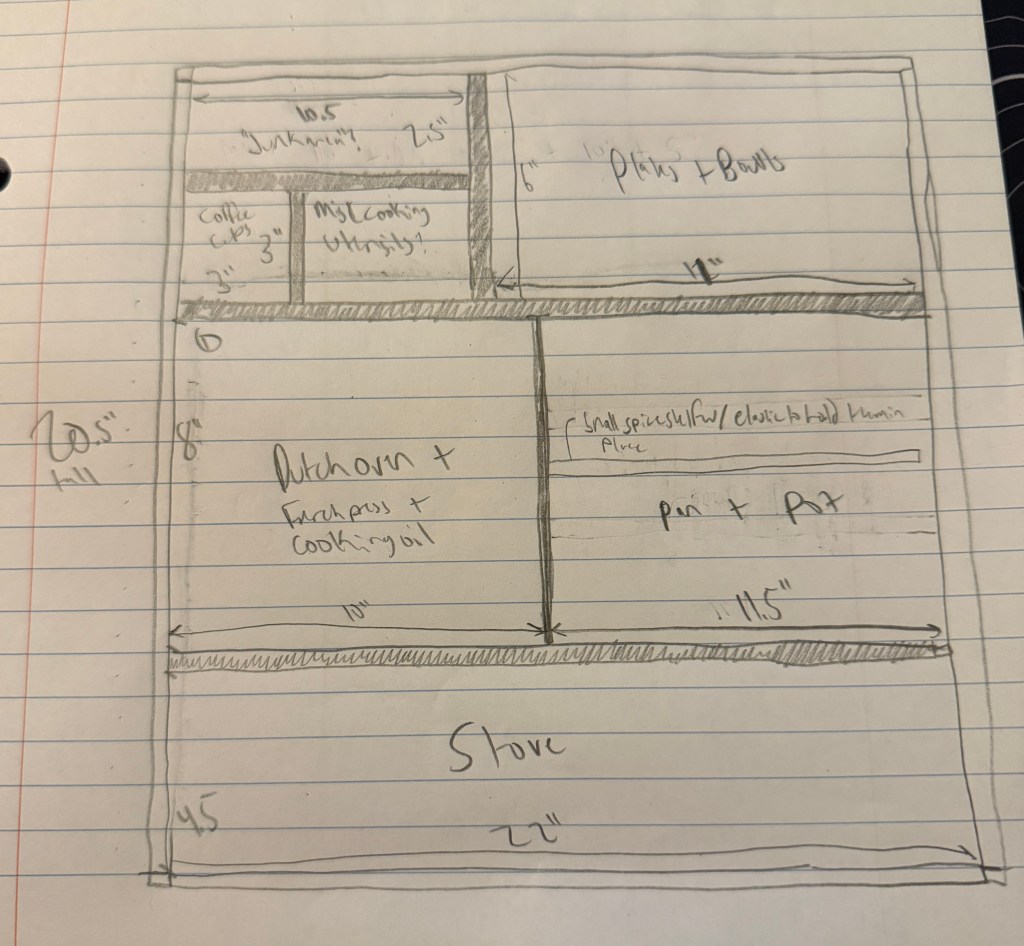
Dimensioning
The next step of the design was creating an internal layout to fit the items I had. I followed pretty much the same levels that the youtube video had.
I started with determining the depth of the box, I went with 15″ to have sufficient room for the stove and fit one of the longer knives I got.
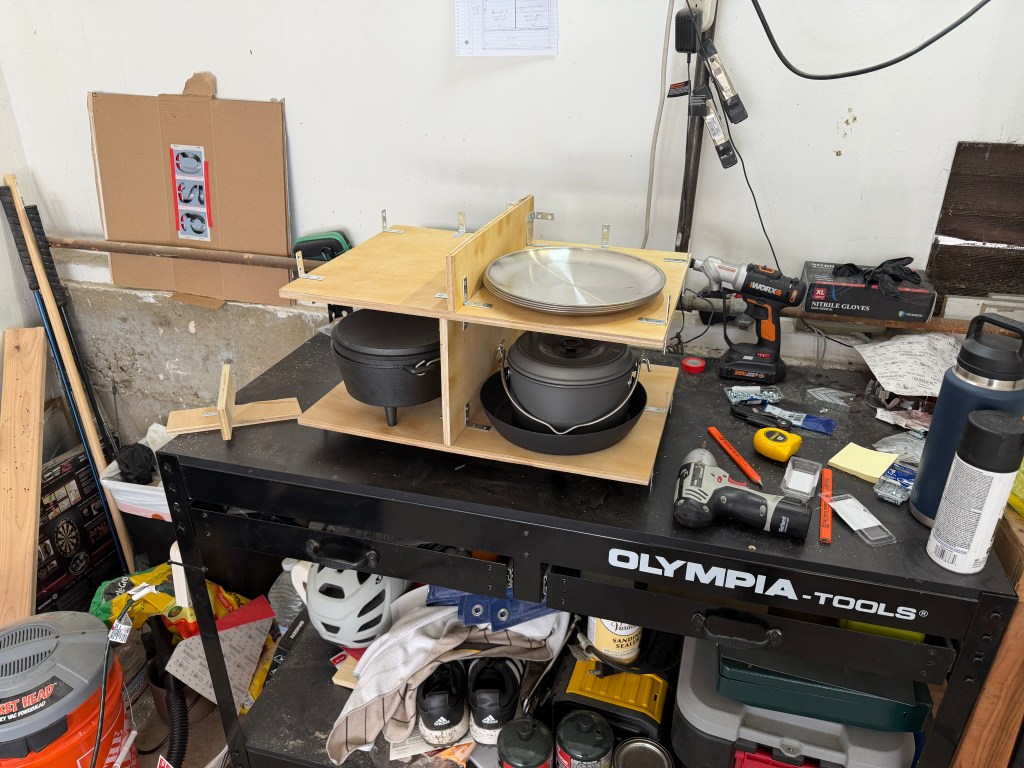
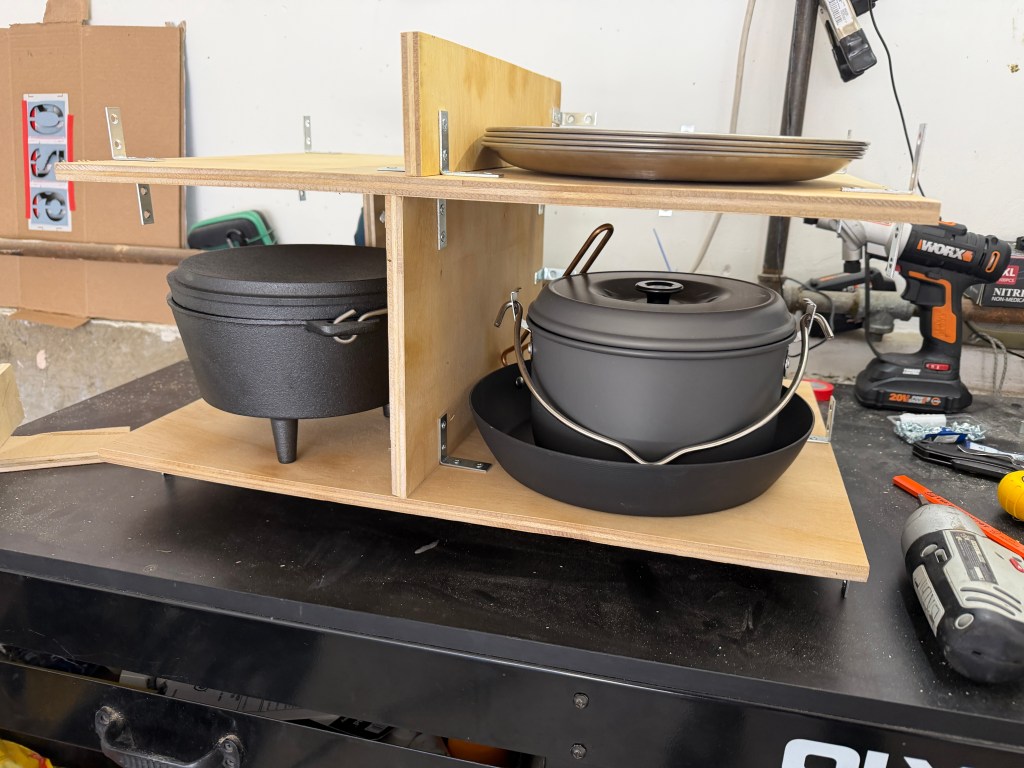
The next step was ironing out the heights and widths. The bottom height was 4.5″ to fit the stove height. I determined the second height from the pot+pan combo, which was slightly taller than the dutch oven. I initially had the bowls stored on the top shelf but that would force the height to be 6″, which messed with how the propane would sit on the side cereal container, so I put the bowls inside the pot and lowered the top to 3″ so it was the height of the metal mugs.
The widths of each cubby worked themselves out by ensuring the larger of the two had enough room to fit. For the middle shelf it was the pan+pot that needed 11.5″. The top needed 11″ for the plates.
My initial drawing of the geometry is in the image below. I ended up having to change it up a bit to get the cereal container to work properly.
Prep Work
Once I got the design ironed out, I got to cutting the wood, adding in handle holes, and clear coating the wood. I wrote out a list of all the dimensions of wood I would need to cut for it ahead of time.
The first step was cutting the plywood down. I was able to use a single 4′ x 8′ x 1/2″ piece of plywood for the whole build. I borrowed a tablesaw to cut it down. In hindsight, I probably would’ve just used my jigsaw, I hate using tablesaws, they feel so sketchy. I had a few kickbacks and left a hole in my garage wall.
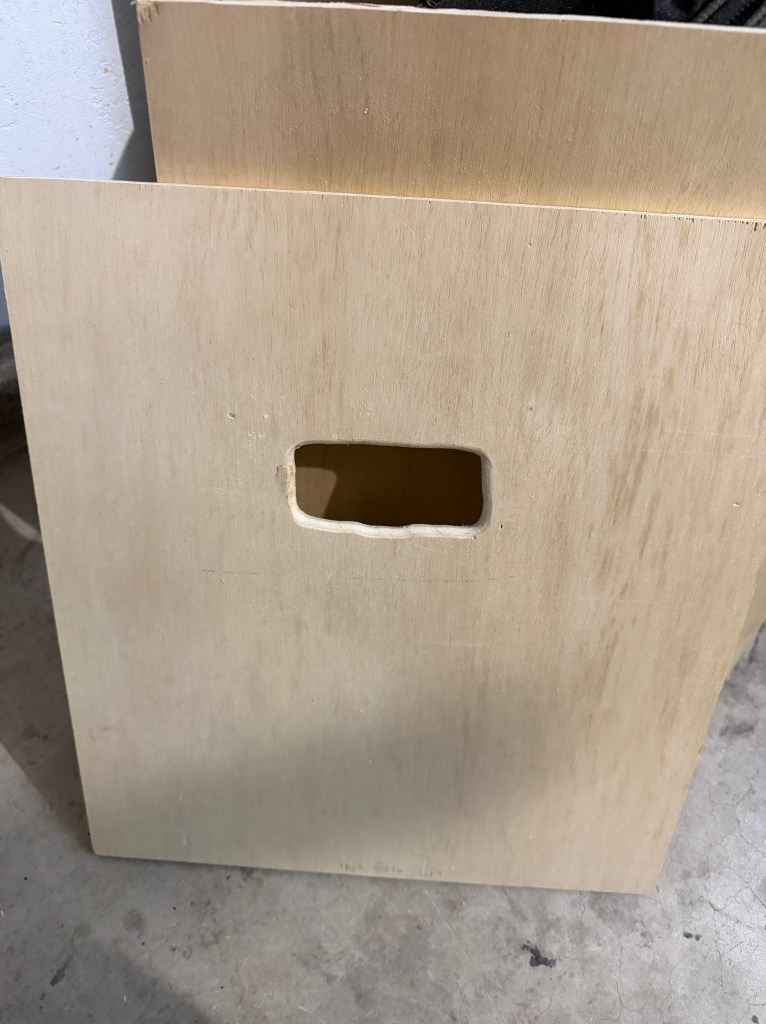
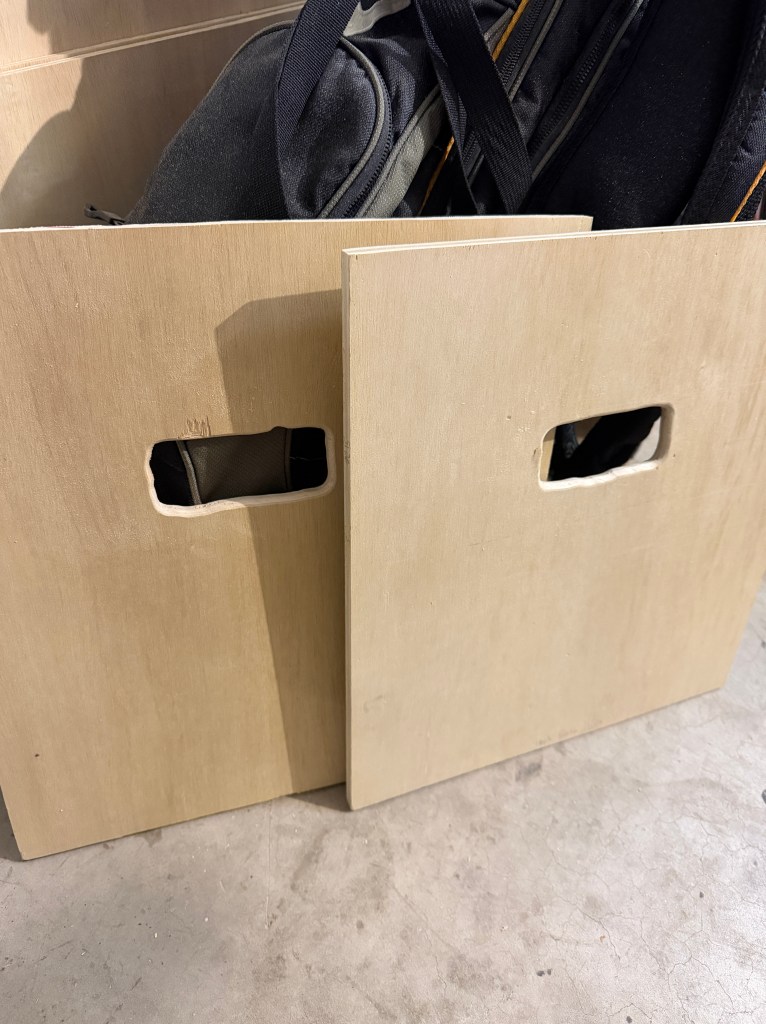
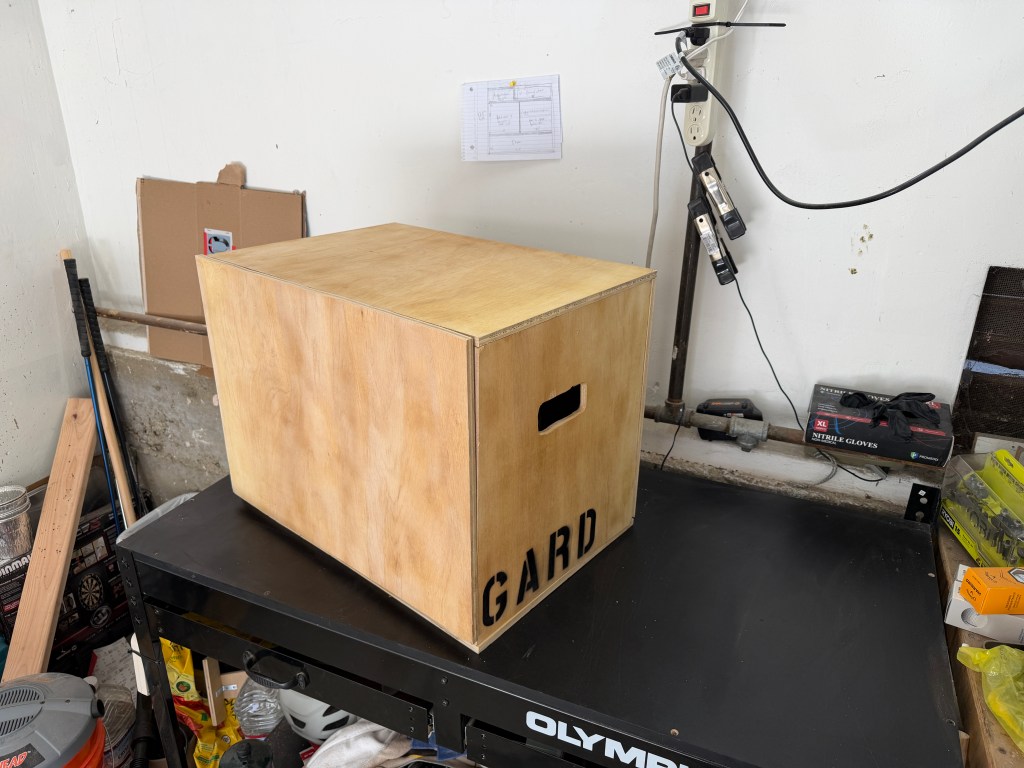
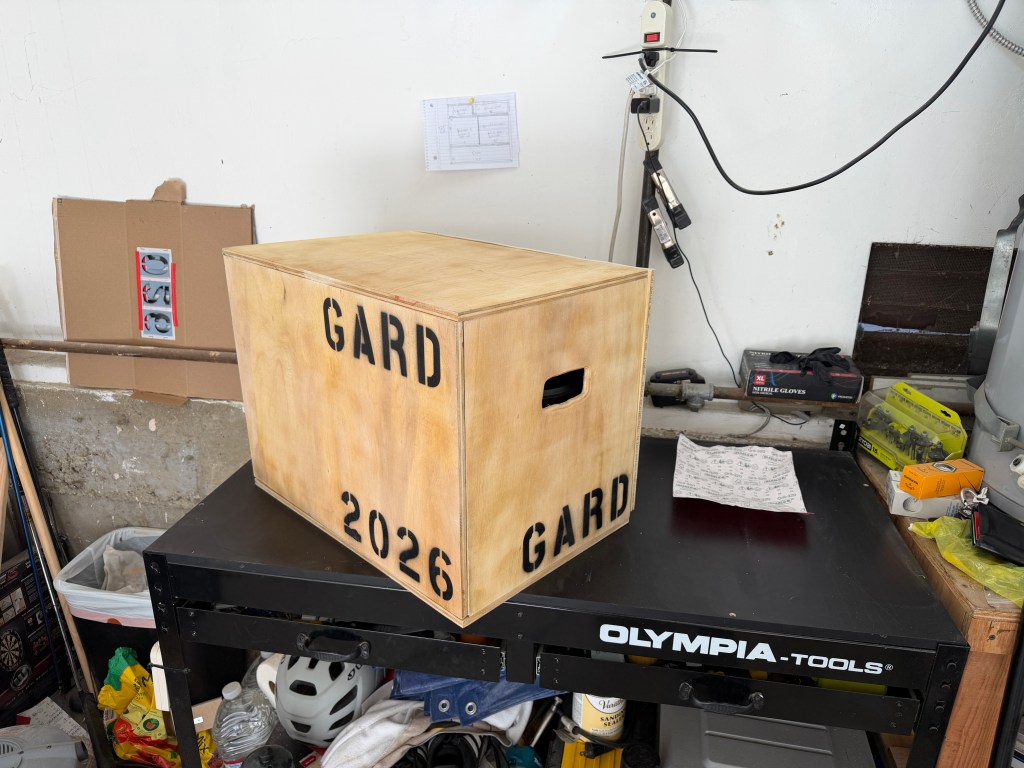
Once all of the plywood was cut down, I cut two handles out of the sides. I offset the handles to be slightly more toward the front of the box. I did this so when you pick it up it naturally leans back a bit (rather than lean forward and allow everything to fall out). I just drilled out initial holes, then used my jigsaw to cut them out. After that I did a quick pass with my router to round the edges.
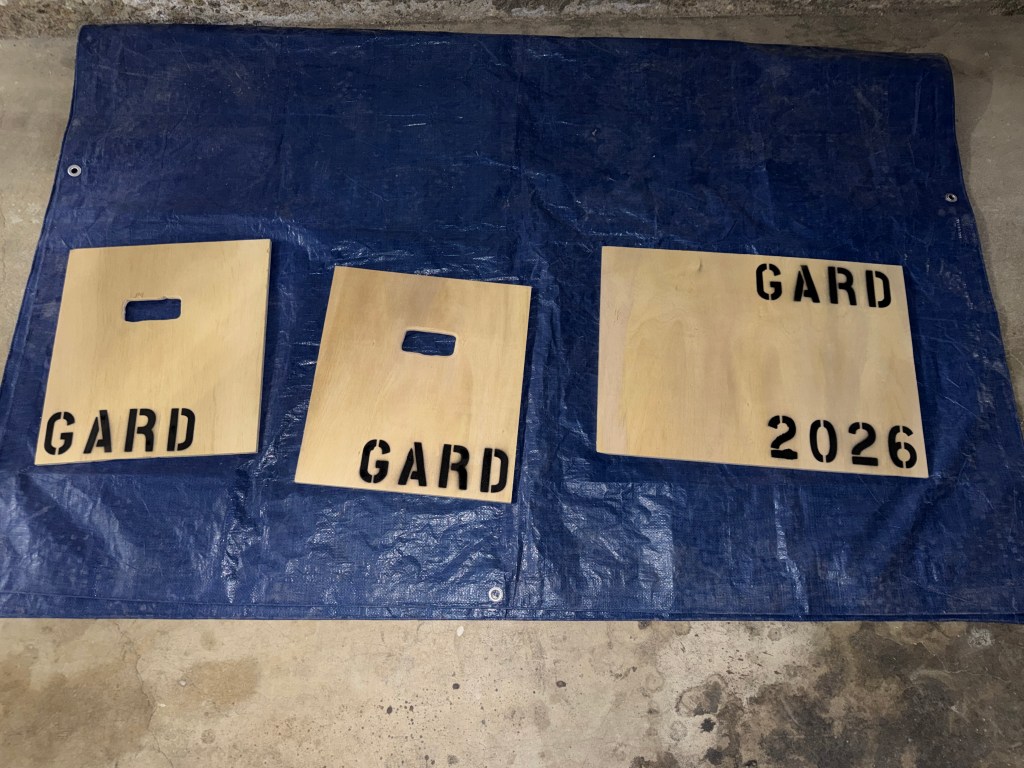
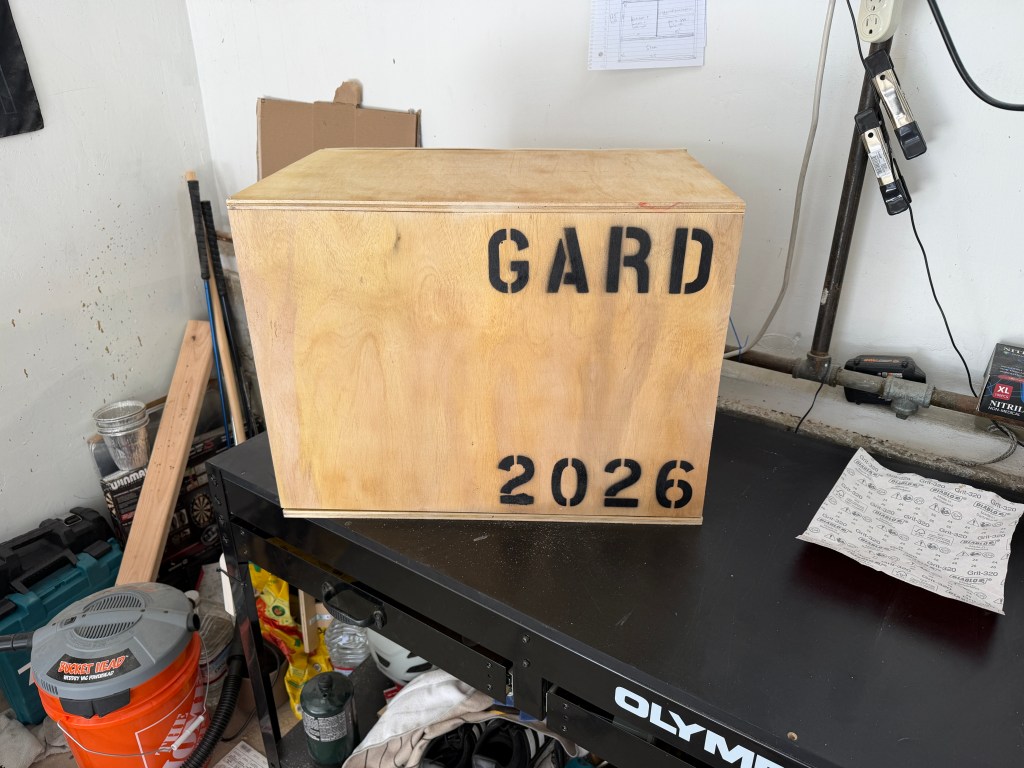
The next step was stenciling on my last name and the year. I thought it would be nice to have both of those on it in case I lose it or lend it out, and to remember how long it lasts (hopefully). After that I added clear coat to it to hopefully resist the elements and wear a bit.
Construction
Once all of the prep work was completed, it was time to start construction. One major hurdle that always comes with projects of this nature, is the order of operations when putting it all together. I didn’t have a pocket hole jig, so I instead used a ton of L brackets to put it together. I would have to be strategic about how I put it together since I wouldn’t be able to screw into some L brackets due to the confined space. The order I went with to build it was:
- Assemble the internal shelves, adding in L brackets where I knew it would connect to the sides and back.
- Laid the internal shelves down on each side, the top, and the back to mark out pilot holes.
- Assembled the outside shape of the box (just the outside, not including the back).
- Planned out how the front would attach with the hinges and magnet closure. I did this part before the shelves were in so I could easily drill in the hinge.
- Inserted the internal shelves into the outside frame of the box and attached it there.
- Added the back on and screwed it in from the inside of the box. This was very hard since the top shelf ended up being 3″ wide and 15″ deep, it was difficult to get the screws in the holes properly there.
- Finally added on the front.
The actual putting it together process can often be daunting. I encourage people to take their time with thinking it through, but at a certain point you have to just start on it. There were some parts I didn’t foresee that I would end up having to go back and change such as the front cover dimensions (it wouldn’t go down all the way, there’s a small gap in the front), accidentally cutting some pieces wrong and having to adjust the design on the fly (the front and back weren’t the right size, I had to move the front to the back, and cut down the back shorter to become the front), and compromising on not all the brackets getting two screws to maintain my sanity.
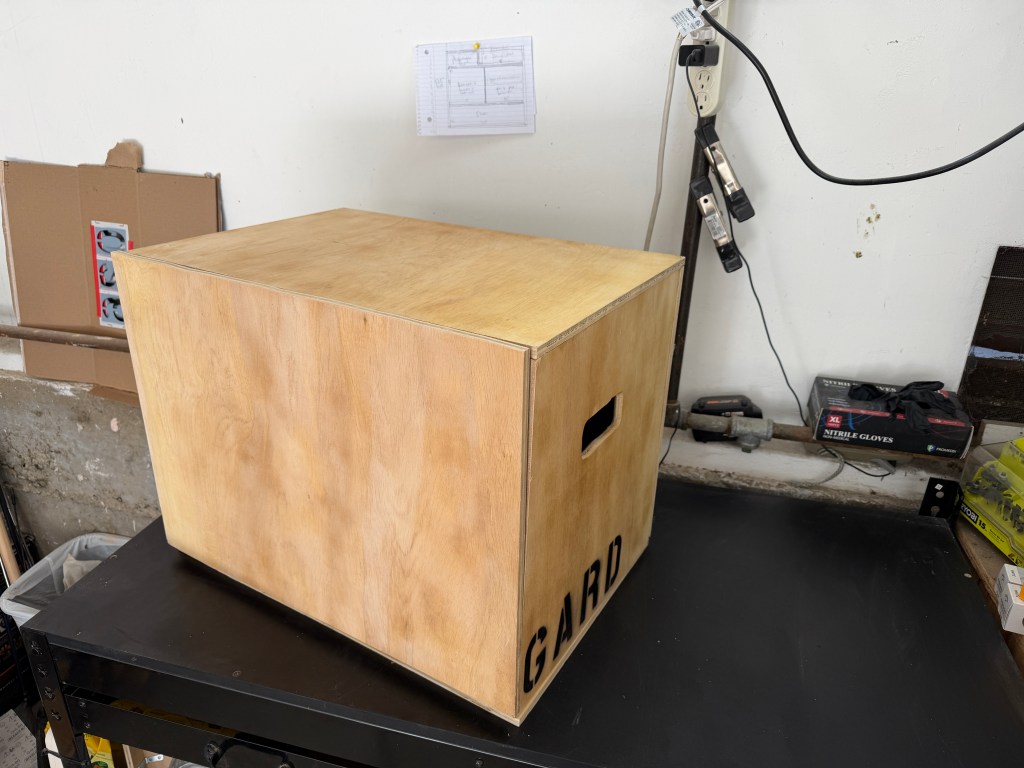
Final Product
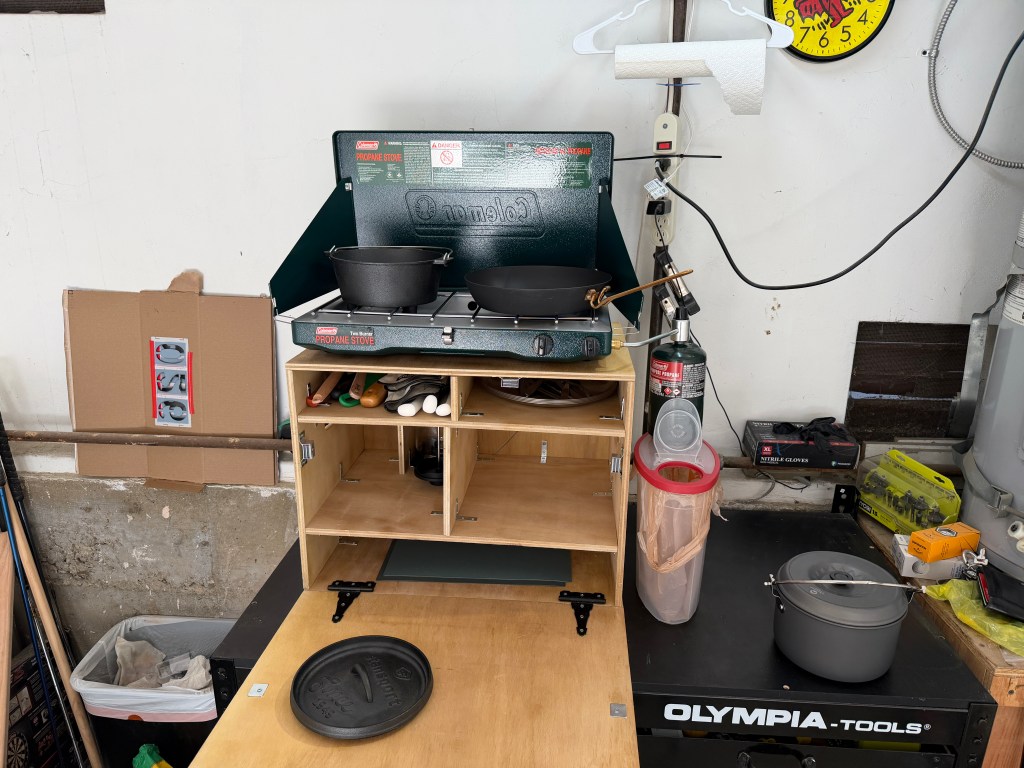
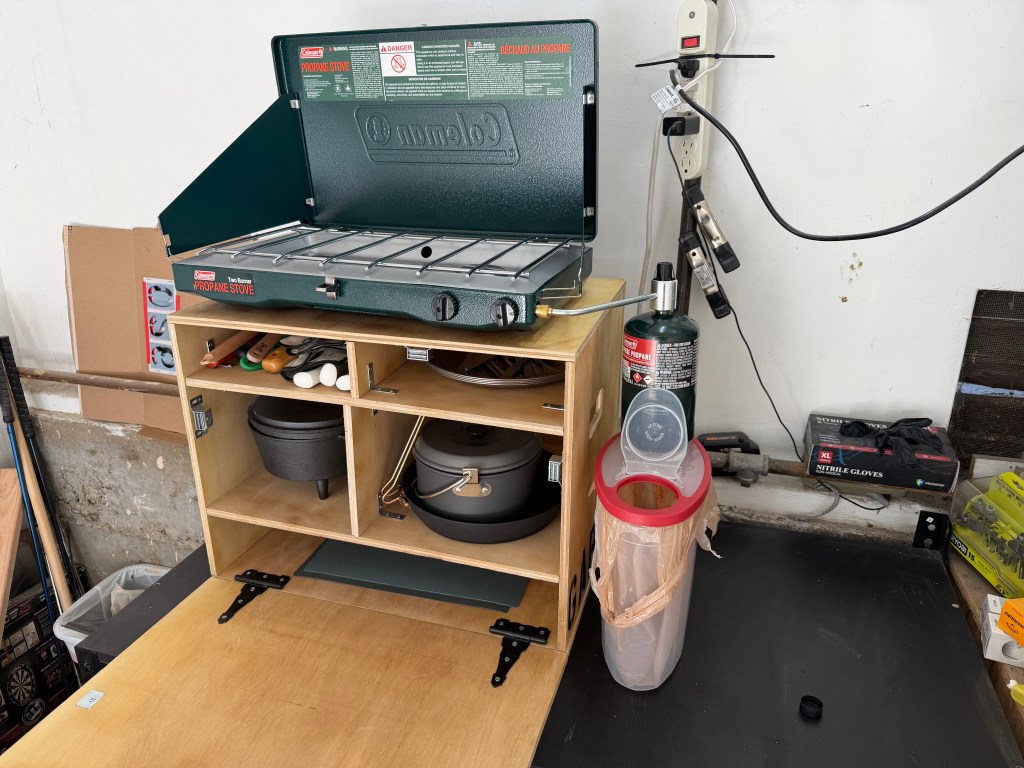
Once the whole thing was put together, it was time to fill it up. Arguably the best part.
Outside:
Inside:
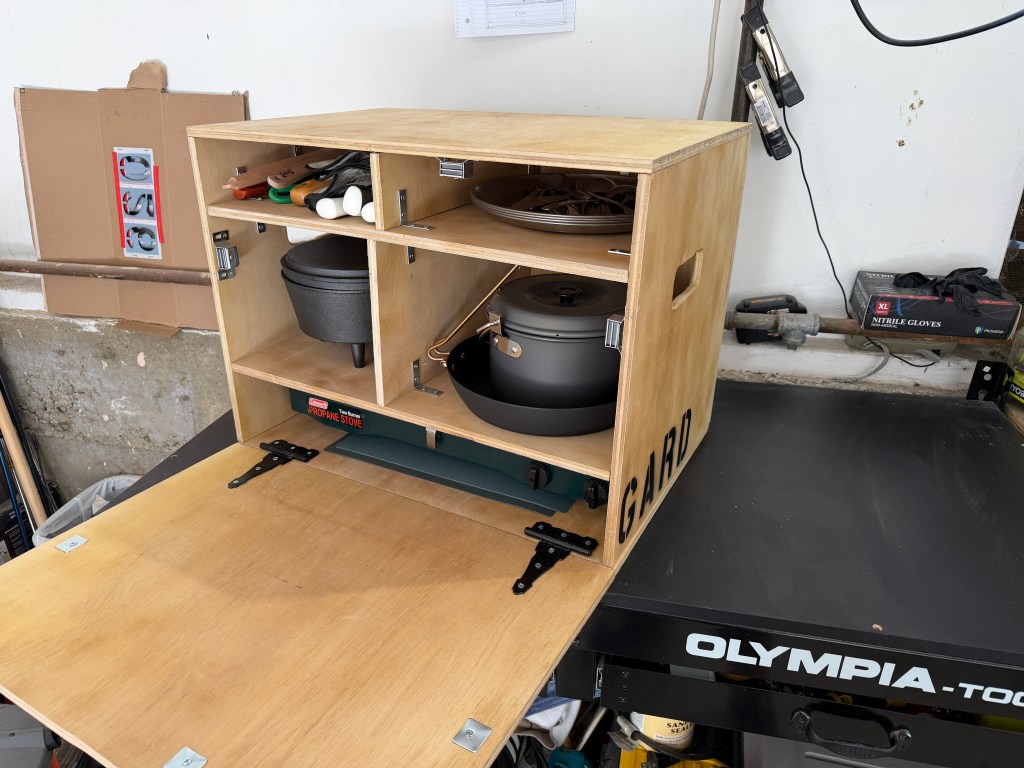
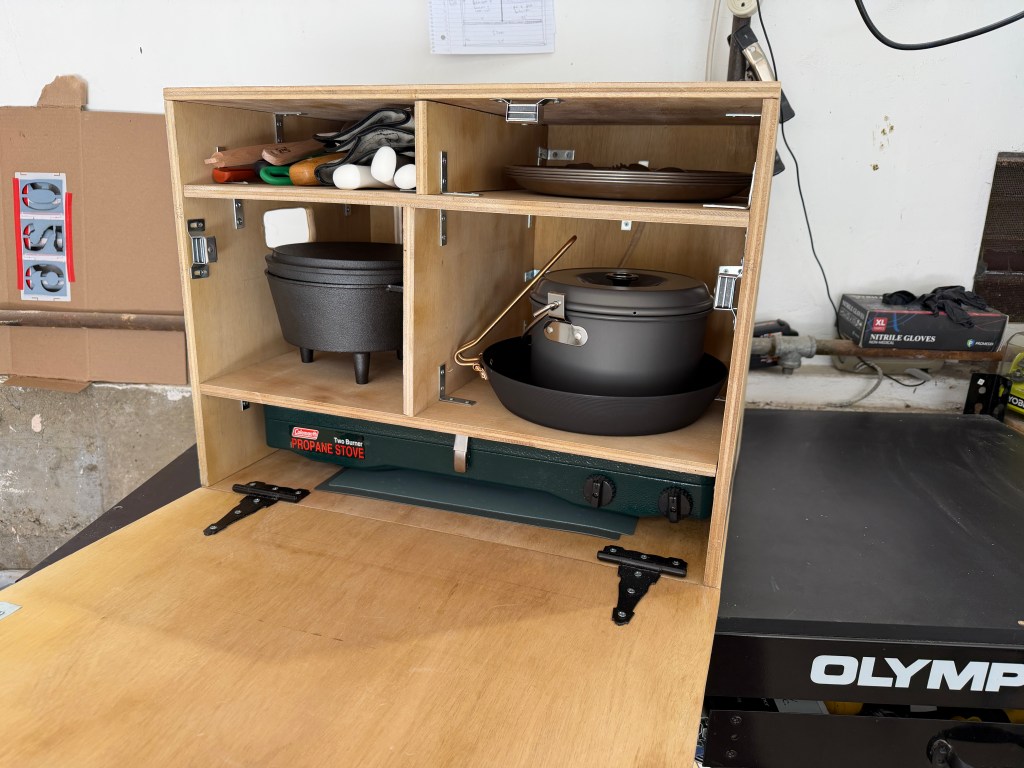
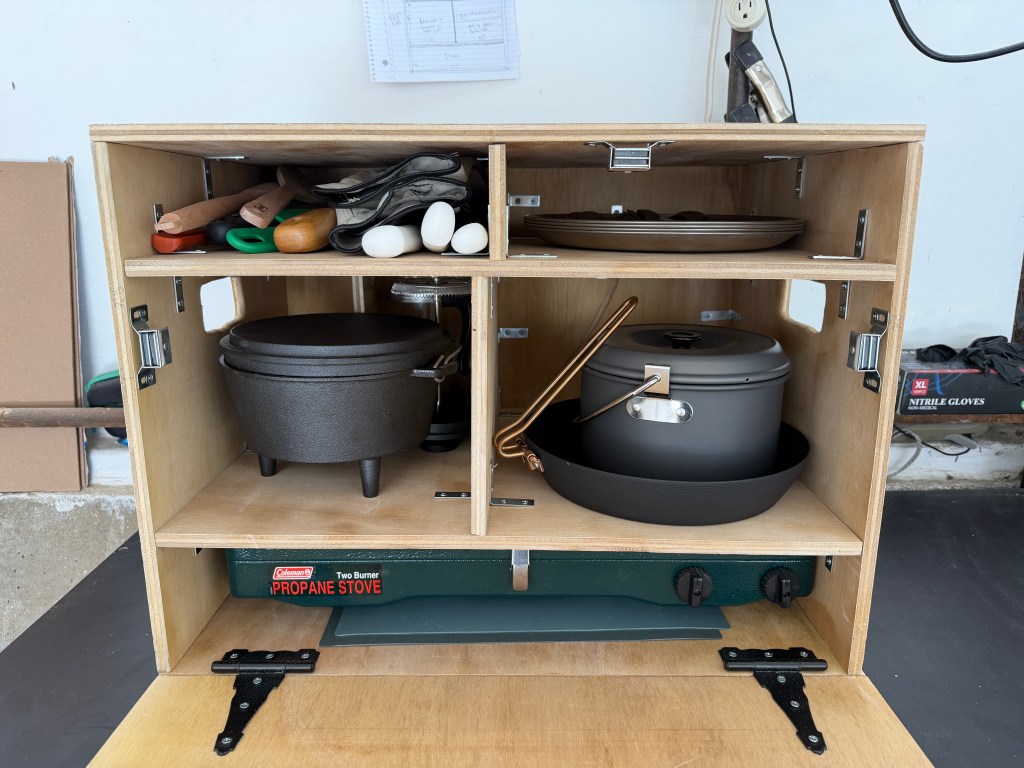
Opened and set up:
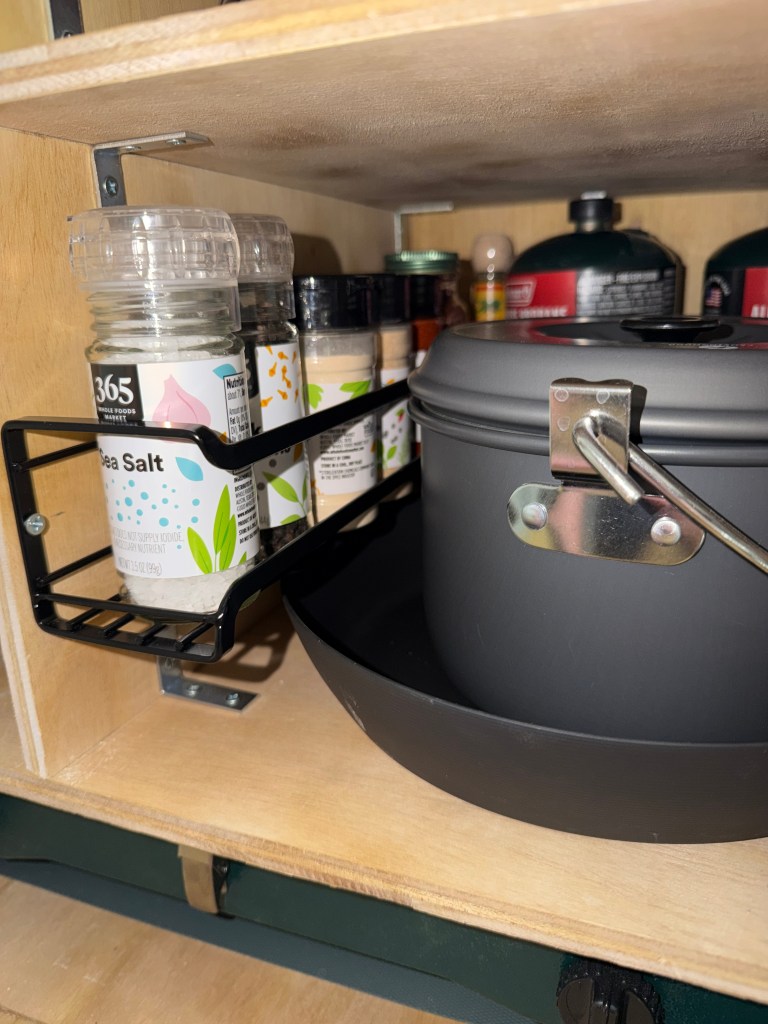
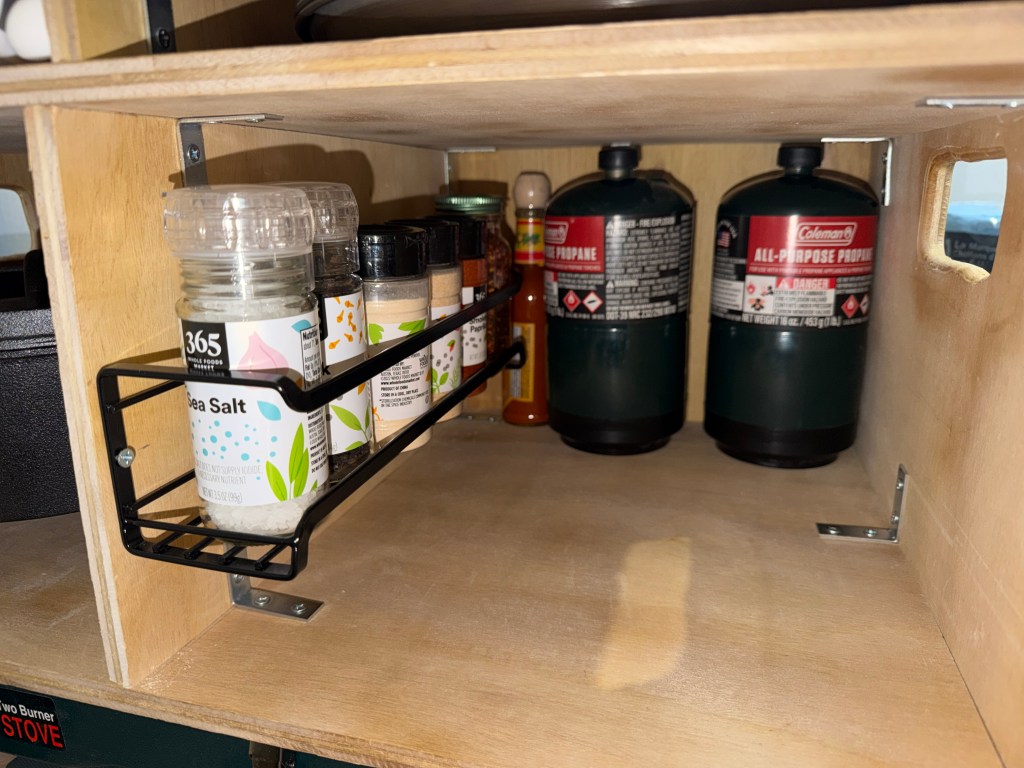
As with most projects, it’s not really done. I’d say this is around 95% complete. There were a few finishing touches I added and some storage I need to adjust. I realized an extra spice rack I had from my kitchen fit perfectly inside the cubby with the pot and pan. It allowed me to add in all the spices I need, fit 2x propane bottles behind, and a hot sauce. Another one was adding in the metal cups, I didn’t have them in time for when I constructed it.

Leave a comment