
The desk build came from a sketch I had a few years back. I encourage anyone who has a desire to build stuff to write down/draw whenever they have an idea. Even if you don’t build it, concepts from the idea could be applied somewhere else in the future. That’s the case with this build.
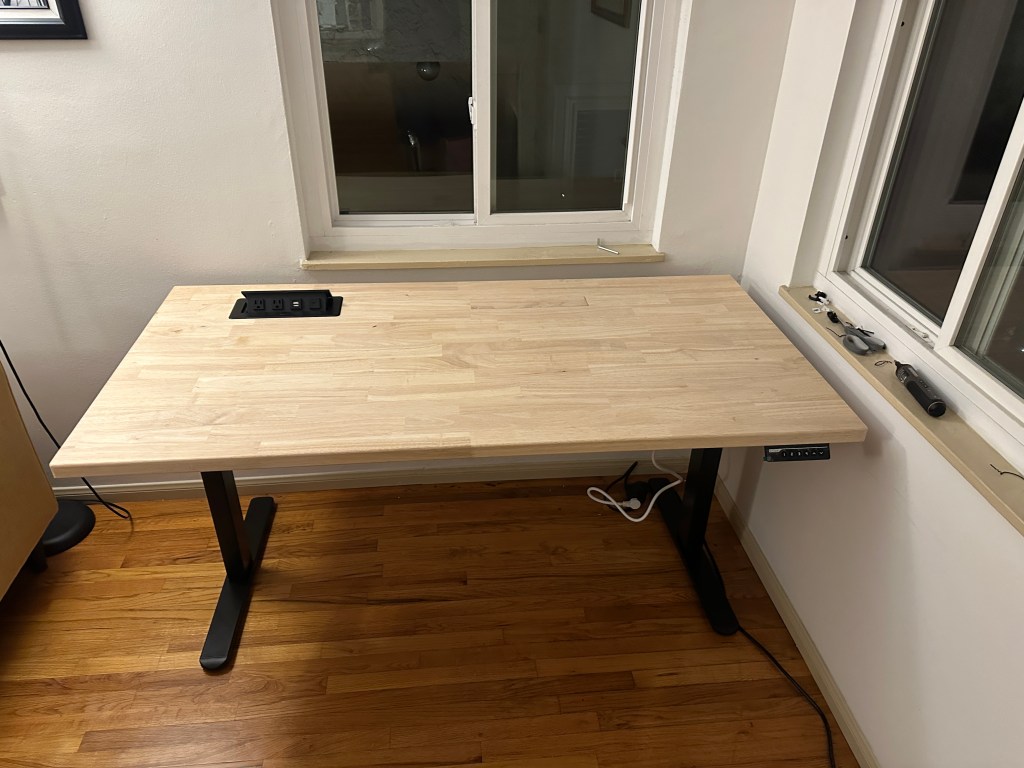
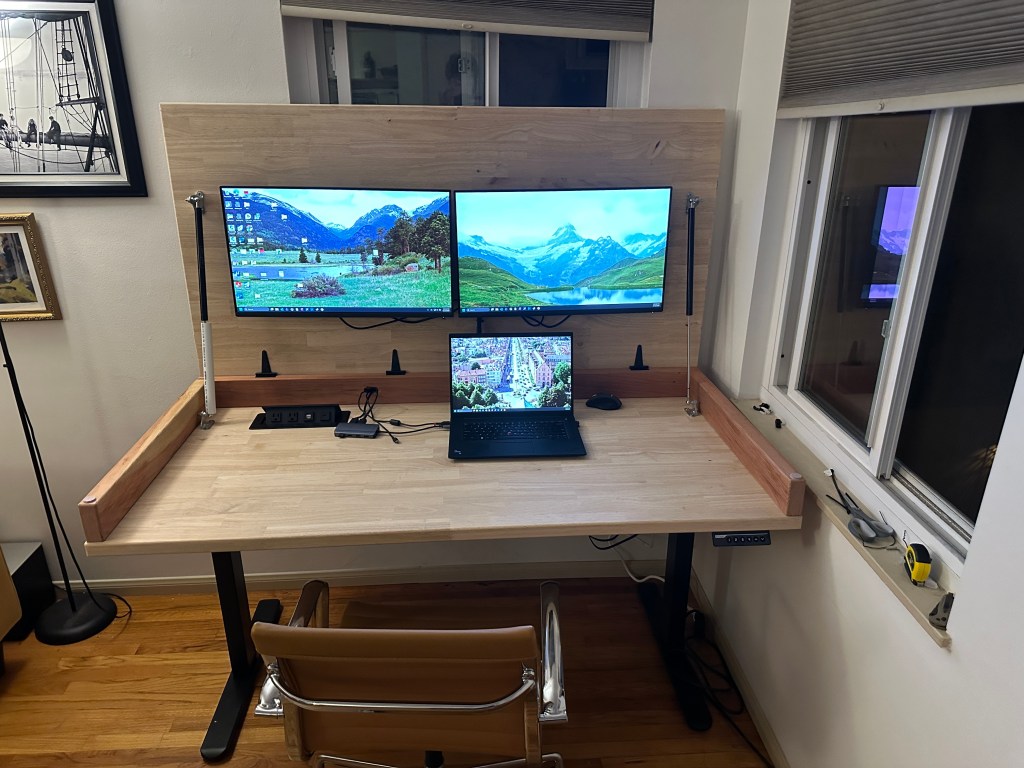
The initial inspiration came from a video I saw with someone who had a monitor that would stow away in their shop space. My first drawing of the desk had one half that would raise up with a monitor stowed beneath and the other side would provide storage and wire management. The final product ended up almost looking like a large laptop made out of wood that opened up to two monitors mounted below. The idea is that when the desk was closed, the top can be used as a large working surface to write/draw and keeps the space looking clean, when opened, it provides a monitor and great workspace for a computer.
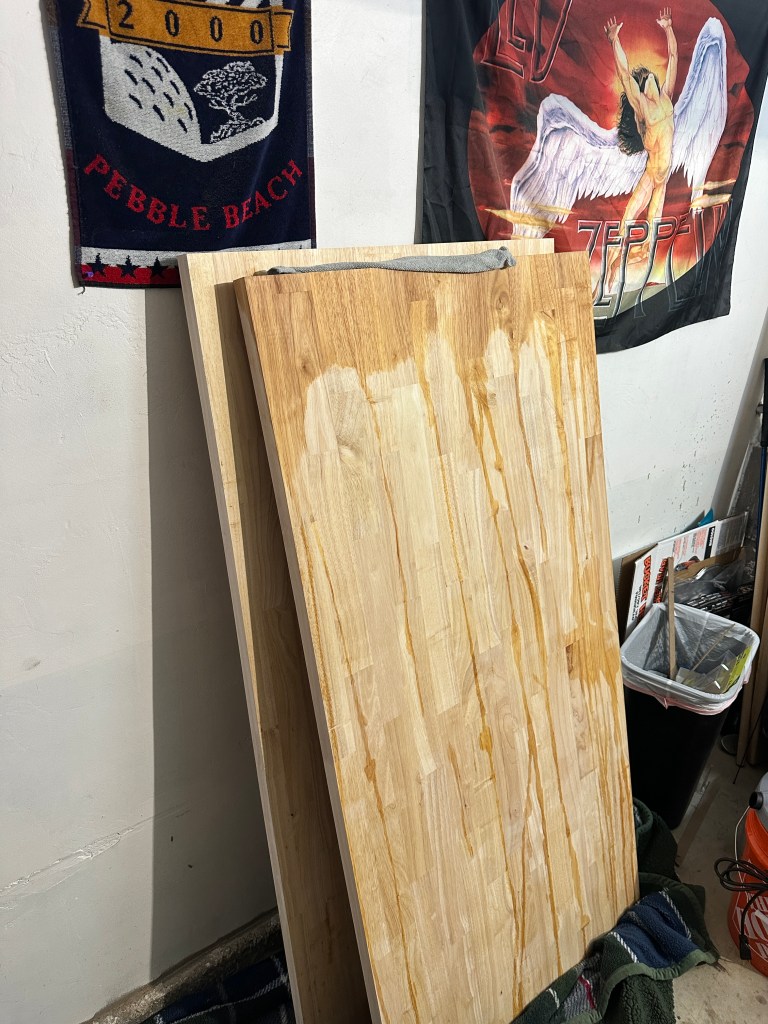
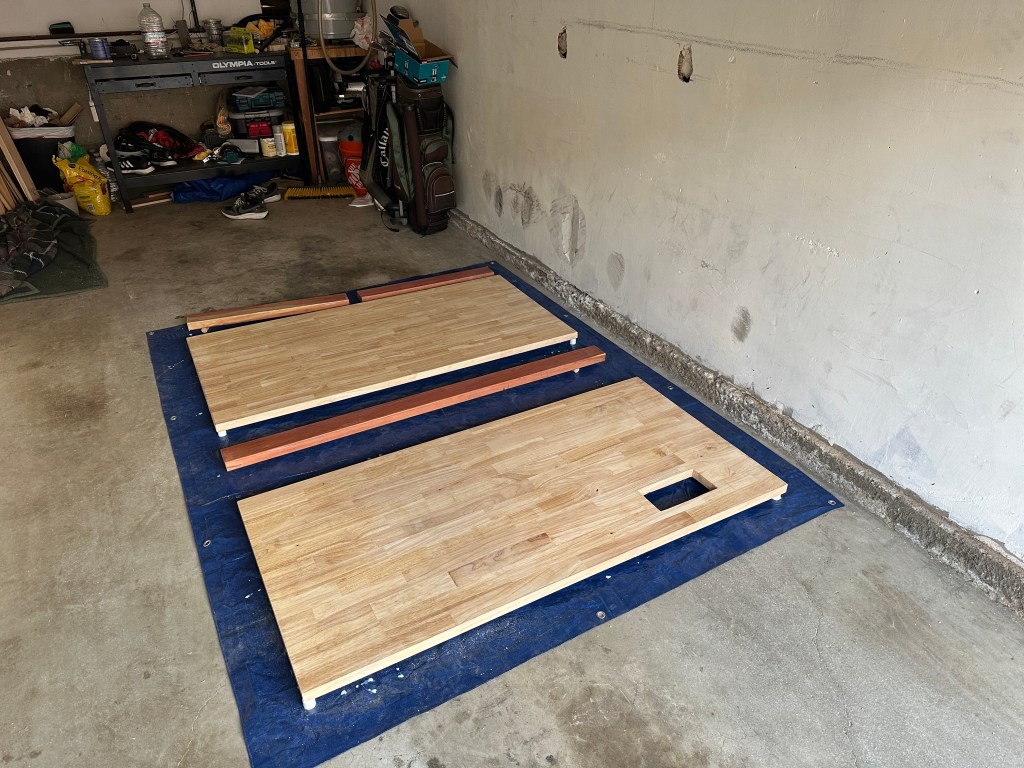
Before I started, I looked into what I would like to implement into the desk and what materials I would need to source for it. Some ideas I wanted to implement were having standing desk legs, a popup plug on the lower surface, and pressurized struts to help lift the desk top with monitors. Some materials I would have to source were all of the ideas I wanted to implement and butcher block slabs for the desk top. I thought butcher blocks would be the best material because it would provide enough rigidity to not sag with the monitors mounted and was unfinished so I could decide what finish to use. Other options I looked at that would’ve been cheaper were plywood (I didn’t think it would be rigid enough and they tend to come warped) or tabletop from ikea (not the worst idea, would be finished already). I found it was easier for me to order and pickup from LA than to source one in San Diego so that’s what I did.
Before getting started on any sort of cutting, I laid out the plan for how I wanted to build the desk. I made an “Order of Operations” note in my phone to ensure I had thought out all the necessary steps so I wouldn’t get to one unprepared. The order of operations included a few different main items: initial prep work, material prep, and construction of desk. Taking the time to write out what I would need to do made me feel a lot more ready to put a saw to wood. Initial prep work included cleanup that I needed to do to prep the workspace (my garage), items I would need to purchase from home depot, and laying out tools that I would need. The material prep thought about critical path items that would need to be done first, along with items that would take the longest so I could go back to using my garage to store my truck.
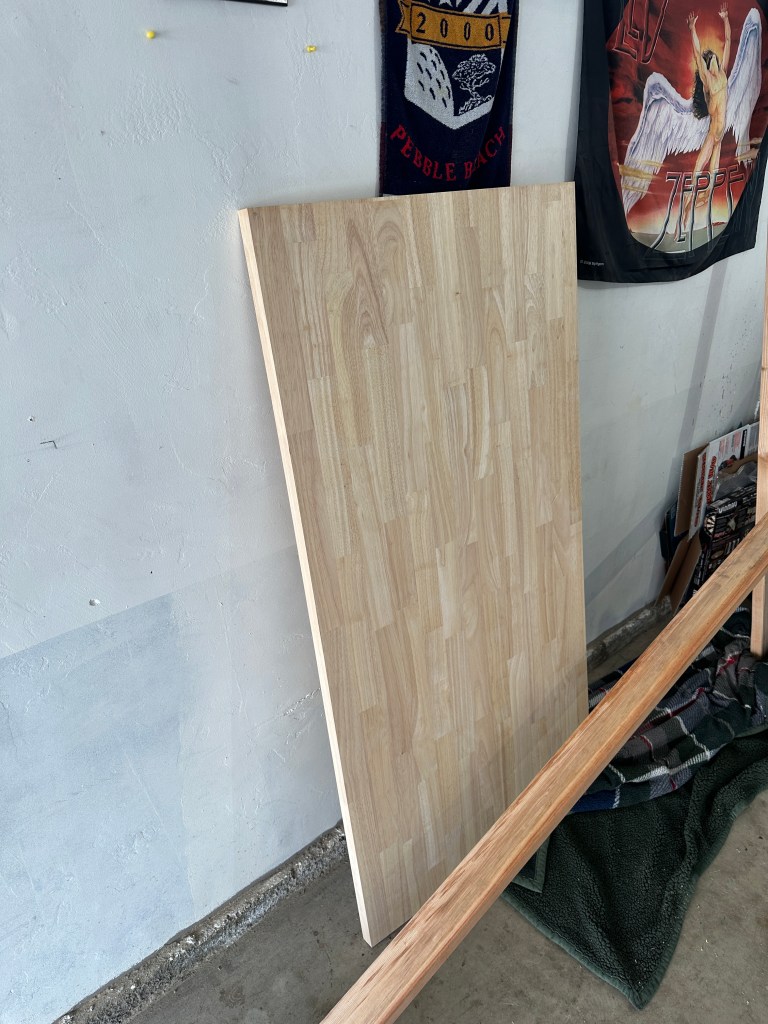
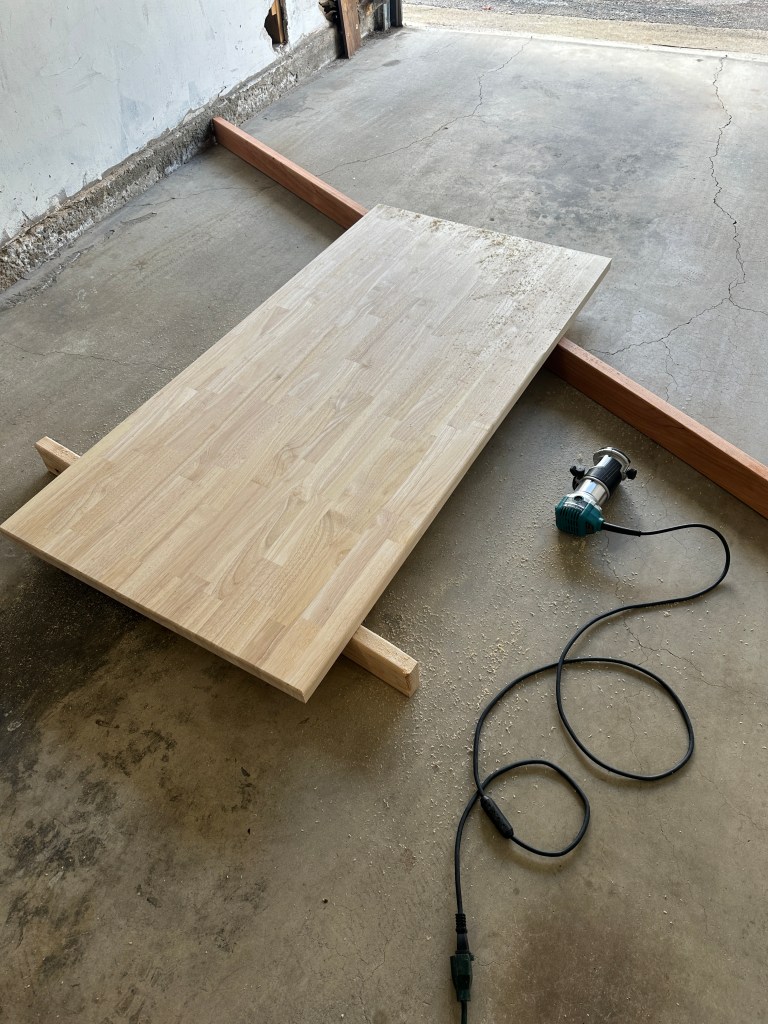
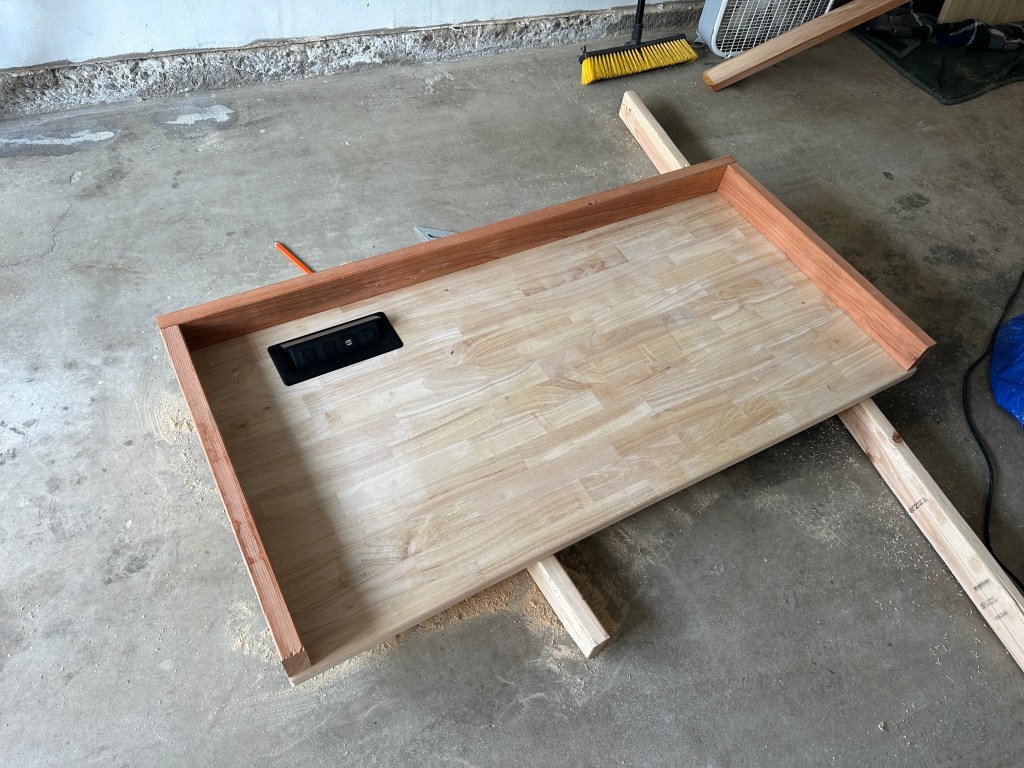
Once the initial prep work was completed, I began the material prep. I started by using a router to round all of the edges of the top board. I started on an edge I knew would be away from sight most of the time to ensure it looked and felt good on the butcher block (butcher block is expensive, it feels scary to work on initially). I used a jigsaw to cutout the spot for the popup outlets. For the 2″x4″ frame, I aligned the boards with the block to ensure they were the perfect length then used a chop saw to cut them to size.
The next step in material prep was to seal the wood. I used the General Finishes High Performance in dead flat. It was pretty easy to apply. I laid out a tarp and used the end caps from PVC pipe on the four corners to elevate off the tarp. You’re supposed to apply ~3-5 coats for surfaces that are high wear, and it takes ~2-3 hours between each coat. To do 3 coats on each side it would take at least 12 hours of waiting. I ended up doing 3 coats on the bottom side of each and 5 coats on the actual desk surfaces. I had to rush it a bit as it was occupying my garage and taking my parking spot. I wish I had done more work to each block between coats, sanding them would’ve gotten rid of a lot of imperfections and drip marks. They aren’t too obvious in the final product so its alright.
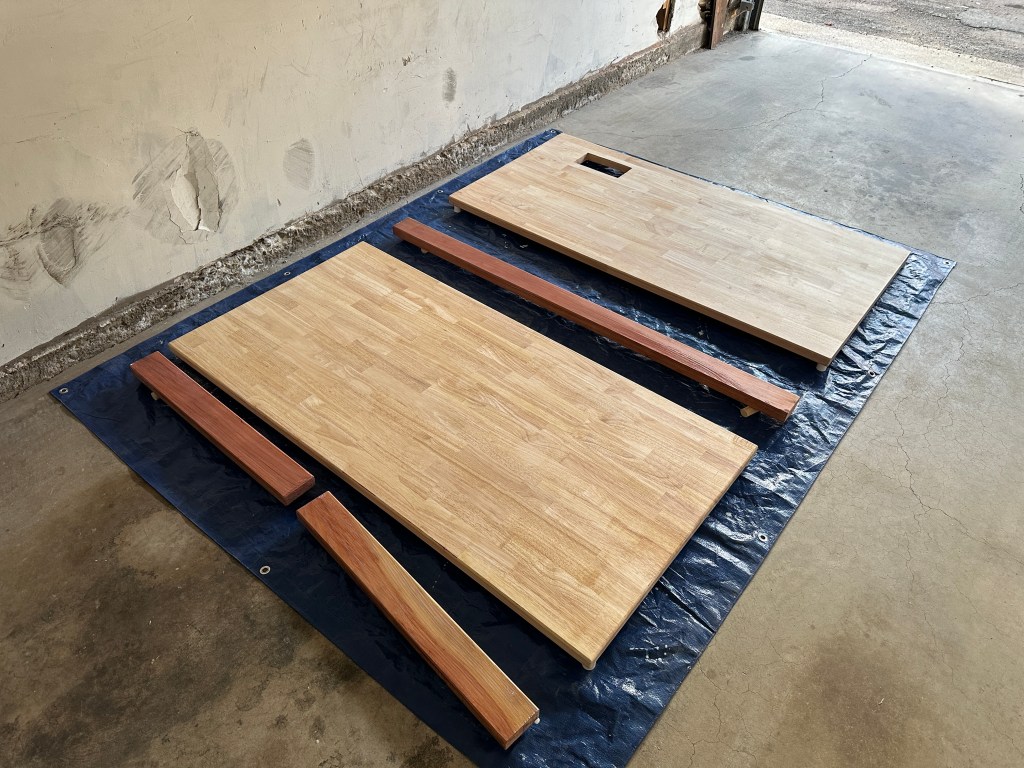
Once they were all done being sealed, I sanded them with high grit sand paper for a smooth finish. The next step in my order of operations was the construction of desk. I had to be intentional about the order here because the desk components are super heavy. Each slab weighs between 40-50 pounds and the desk legs weigh about 40 pounds themselves. I decided that I would attach the bottom slab to the legs first, then construct the frame on the top slab inside my apartment, then put that on top of the bottom slab with legs and screw in from the bottom. I am not looking forward to the day I have to move, this thing is incredibly heavy.
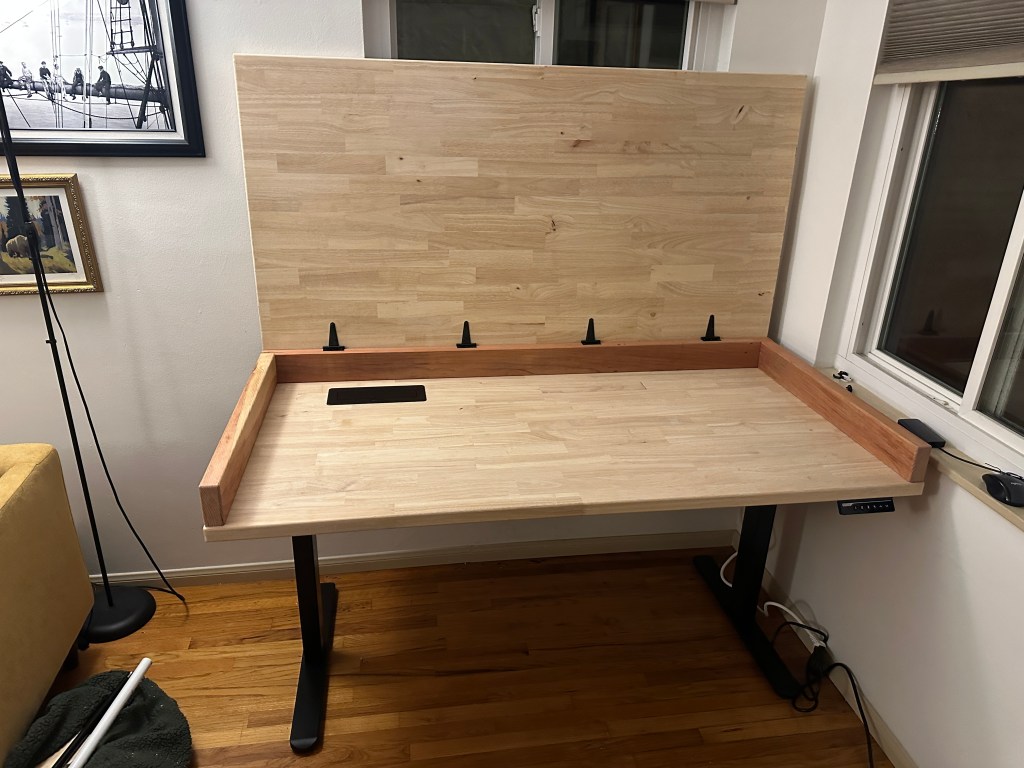
The next step in desk construction was adding more of the finishing touches/details. That included the pressurized struts, monitors, and cable management.
The pressurized struts went first. The instructions for mounting them are a little goofy. it’s a bit hard to conceptualize the geometry of opening and closing. They ship with a strap that holds them in the compressed position, I would recommend keeping one with the strap on to mock up the geometry. I started by laying them out in the opened position, then taped down the brackets and closed the top, and checked the length when closed. Once I was confident that it would open and close properly I felt good about mounting them. I added a PVC pipe safety on one of the pressurized struts, this forces me to move it out of the way when closing the desk to not have it close on something and thus breaking the monitors. The struts I got were a little weak so I upgraded to some heavier weight struts.
The next step was mounting the monitors. I got two dell monitors with the lowest profile mount I could find. This configuration allowed me to use 2×4 for the frame while still having some clearance below. In hindsight I would’ve used 2x6s to have a little bit more space underneath to have room for a mouse and keyboard with it close. I added 4 extra holes on each mount to spread the load since I was using shorter screws. To determine spacing of the mounts, I used the width of the monitor with about 1/4 of an inch extra. I should’ve put them right at the monitor width, I don’t love the little gap. Screwing in the mount locks was the toughest part, I had to use a driver extender to reach the screw holes. I used a little vaseline to get the screw to stay on the phillips head while I guided it down to the screw hole.
The last step was wire management. I drilled a hole in the back of the frame to be able to feed the monitor HMDIs and power, then another to feed the HDMIs and laptop power cables back into the desk area. The standing desk legs came with a metal sheet that folds into a little basket to hold wires. I also utilized the included stick on wire tie downs, I’d recommend screwing them in to be more secure.

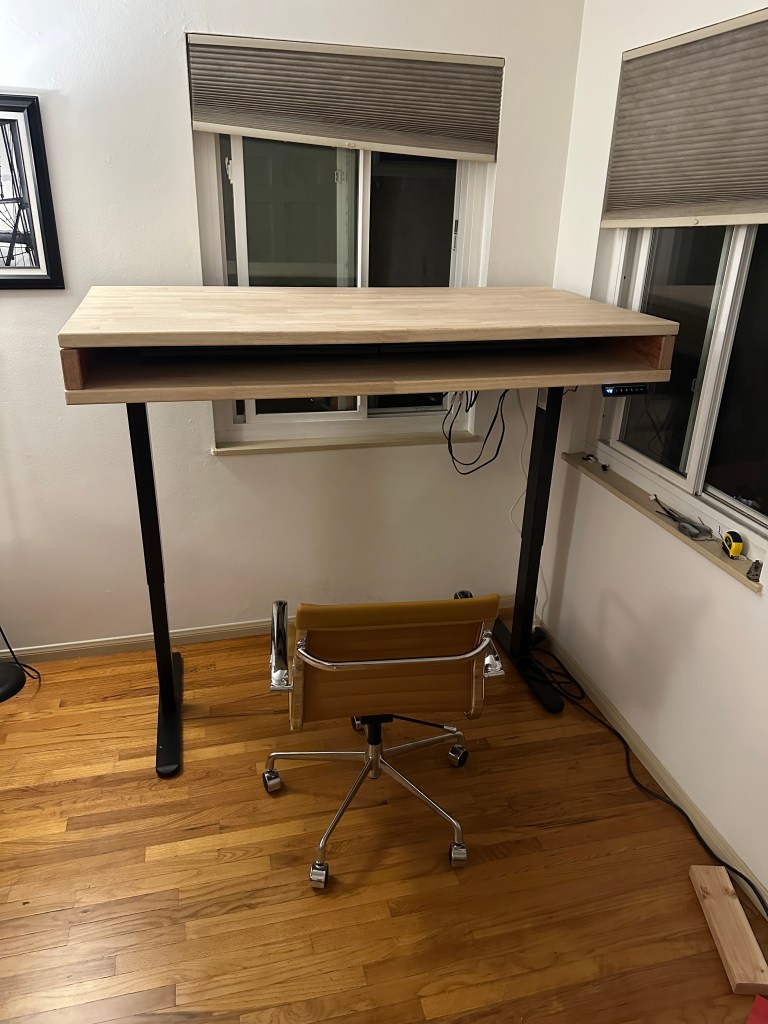
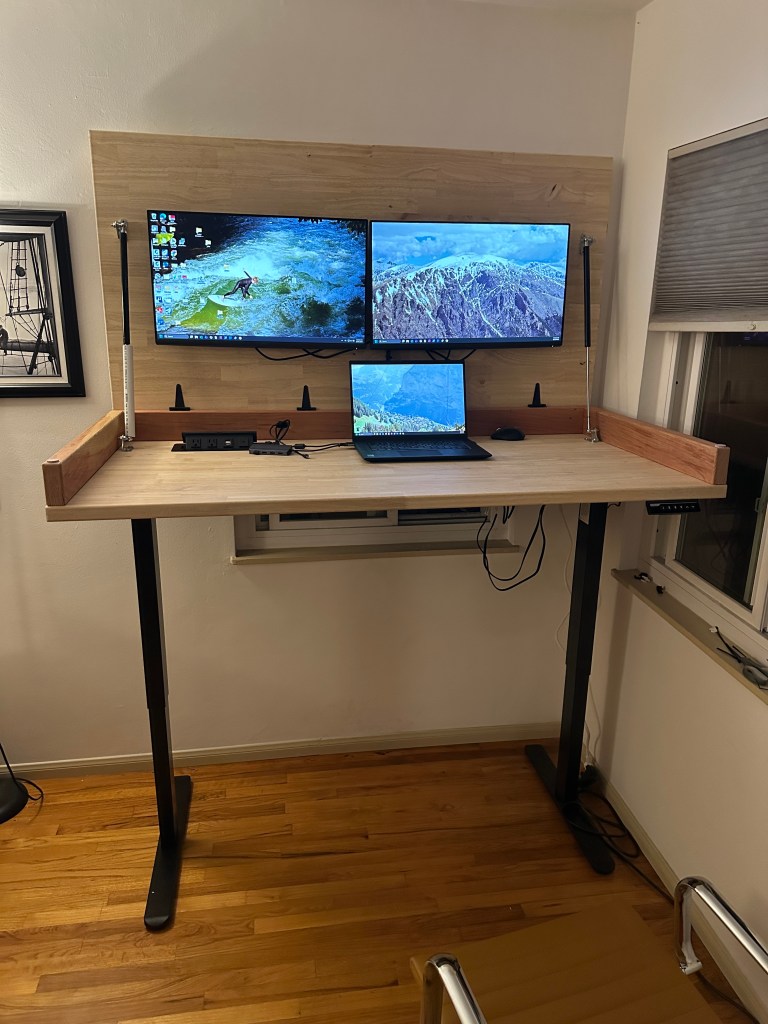
This is the current final product. There are a few additional items I want to do before really calling it final. I plan on getting a dedicated keyboard/mouse and some sort of storage drawer system for below.
I’m very satisfied with how this came out. I was a little intimidated to start the project based on how expensive some of the materials are but it ended up being a lot easier than I thought. I realize there are some similar products that serve the same function, but I’m very proud that I was able to build this and have a result I’m super happy about, that fits my space well.

Leave a comment